How To Create a Facebook and Instagram Ad: A guide for beginners

Written by: Sabrina Huot, Communications & Outreach Coordinator, Alberta Emerald Foundation
So, you want to create a Facebook or Instagram ad? Great choice! With almost 3 billion people on Facebook and Instagram, these ads are a fantastic way to reach a large audience and help meet your communications goals. Additionally, social media ads are super cost-effective when it comes to marketing!
Creating your very first ad can seem daunting at first, but once you get over that initial learning curve, it becomes second nature! Here’s a step by step guide to help you get started:
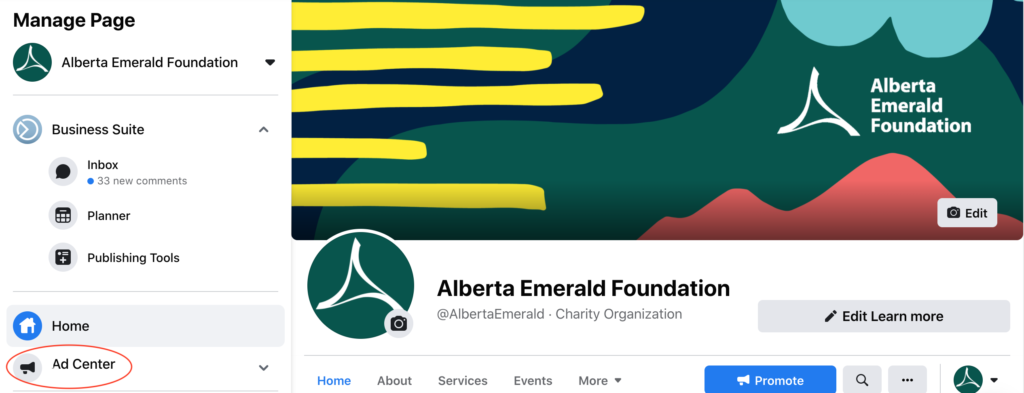
1. Head over to your Facebook business page
Once you’re on your business page, you’ll want to click on “Ad Centre” in the left-hand column (see below to check out exactly what it looks like)
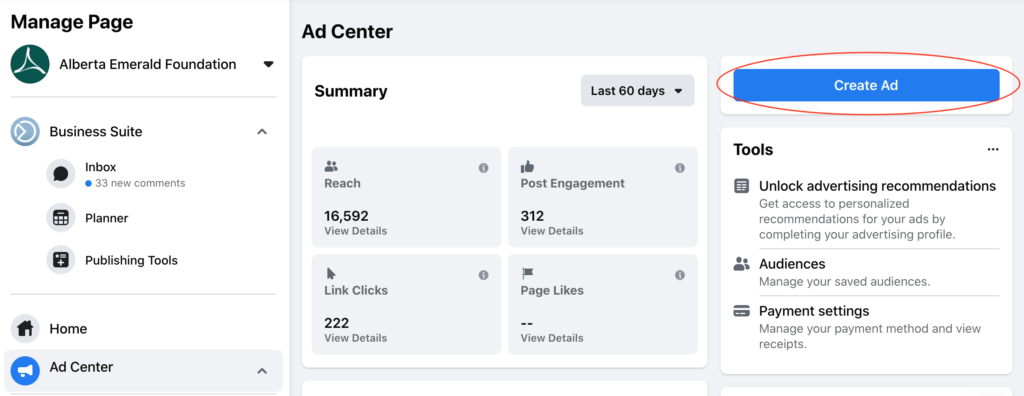
Once you’ve clicked into your ad centre, click “Create Ad”
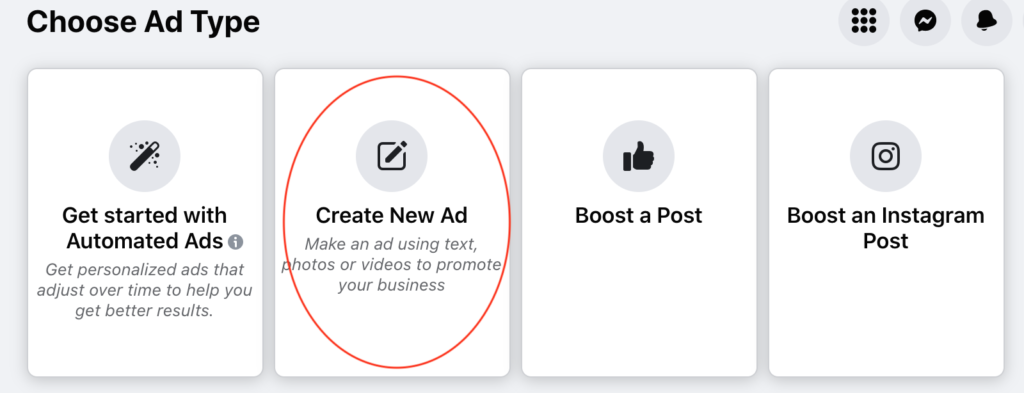
2. Choose what type of ad you want
There are a few options listed under this step, however, because we’re beginners here, we’re going to choose “create new ad”.
3. Pick your ad goal
Now we’re into the meat and potatoes of creating a Facebook ad! Based on what you’re creating an ad for, you’ll need to pick your goal ad. There are quite a few options, but the most commonly used goal (and the best choice for beginners) is “Get more website visitors”
Choosing this ad goal will allow you to include a link with your ad that Facebook users can click on when they see your ad. This type of ad goal works well if you want to promote your website, an event, video, podcast episode, etc.
4. Choose how you want your ad to look
Here’s the fun part, you get to be creative!
Now, there are two options for this step:
- Use one of your existing posts
- Create a brand new post that won’t be listed on your timeline or Instagram Grid
Here’s a breakdown of the two options:
- Option #1: Use one of your existing posts
On the top right-hand corner of the “ad creative section” click on “use a post”

Once you click on this, you’ll be prompted to choose one of your previous posts from your Instagram or Facebook. Once you choose one, all of the information you need for the creative section will be filled out, easy peasy!
- Option #2: Create a brand new post
In order to create a brand new post, you’ll need to do the following:
- Write a description for your post
- Try to keep this relatively short, you don’t want to overwhelm people with too much information. Only include key information that the user needs to know about why they should care about your ad
- Add image(s) or a video
- Add a headline
- The purpose of the headline is to grab visitors’ attention and make them want to click your ad to learn more. You only have 25 characters for your headlines, so make it count!
- Insert the URL you want users to be taken to when they click on your ad
5. Determine whether your ad fits under a “special ad category”
These usually consist of ads about credit, employment, housing, or social issues, elections or politics. If your ad fits under any of these, you’ll need to get authorized to run these types of ads. You can learn more about that process here
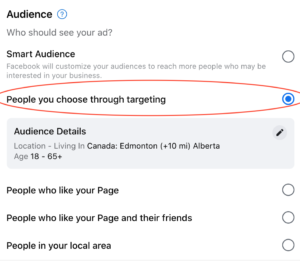
6. Decide who you want to see your ad
This is the point in your ad creation process where you choose the types of people you want to see your ad. Once again, there are various options to choose from, but the one you should start off with as a beginner is “people you choose through targeting.”
Once you choose this option, you’ll want to adjust your audience details. You can do this by clicking on the pen icon. You’ll have the option to customize the gender, age, location, and interests of the people who you want to see your ad.
Choosing the gender, age, and location of your audience is pretty simple, but the more involved part comes when you need to choose the interests of your audience, which can be done under the “detailed targeting” section. Within this section, you can choose from demographics, interests, and behaviours.
7. Choose how long you want to run your ad for and set your budget
You’re almost done! Now you need to set the number of days you want your ad to run for and decide on your daily budget.
Ad Length
- You can choose to run your ad for any number of days you want, but it’s important to note ads that run for at least 4 days tend to get better results
Ad budget
- Choose the maximum amount you want to spend on your ad each day
- Keep in mind that your total ad spend will equal the total number of days your ad runs times your daily budget (for example: an ad that runs for 4 days at a daily budget of $10 will have a total ad spend of $40)
8. Pick where you want your ad to show up and submit your payment information
When choosing where to place your ad, there are three options:
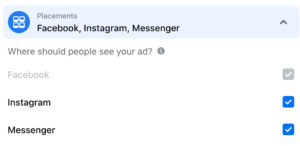
Facebook is a required option, but you also have the option to have your ad show up on Instagram and Facebook messenger. In my experience, having your ad shown on Facebook alone leads to higher reach and link clicks, but you may want to include Instagram and messenger depending on the demographic you are targeting.
9. Let your ad run and assess the results!
The hardest part is done, now you can sit back, relax, and let your ad run, well… almost! You should keep an eye on your ad as it runs to track the results (likes, comments, reach, and link clicks). If your ad isn’t achieving the results you hoped it would, you can always edit your ad while it’s running to try something different!
Sabrina Huot (she/her) has her Bachelor of Commerce with distinction in Marketing and Management from MacEwan University, she also holds a certificate in the fundamentals of digital marketing. In her spare time, Sabrina loves hiking and camping with her dog Cleo and her partner, Mark